Showing posts with label Top Anchor Quilting Tools. Show all posts

Quilting with Rulers: Orange Peel and Continuous Curves

One of the neat things about being a Craftsy Instructor is it's a great source of questions regarding quilting with rulers on sewing machines or sit-down long arm machines. Good questions, even those that someone might think is a stupid question (and I don't think there's such a thing), let me know when there's an area that needs a deeper look and better explanation than I can do in seven 20 minute somewhat one-sided lessons.

I've had a few questions over the years as to what size ruler to use for orange peel or continuous curve designs in squares of piecing, usually with someone asking for a ruler recommendation for a particular sized block.

It's quite a difficult question to answer with words, or at least explain the 'why' of the answer. But today, I just felt like giving this question a fuller explanation and since it's longer than really can fit in the Q&A portion of the Craftsy platform, I figured I'd tackle it here. (Of course leaving a link in the class platform.) So here goes....

Q: What size ruler do I need for an orange peel design on a field of 4 inch blocks?

A: It depends.....

See? That's why it's hard for me to answer in words! If I were a ruler making company, I'd probably tell you exactly what size, or sizes for each block size, and a handy link to buy said rulers. That's why my second Craftsy class (instructor affiliate link) is all about making the most out of rulers you may already have.

I do have a shop that I sell rulers from, but I'm first and foremost a quilter, and the frugality that's been a huge part of my life as a stay at home mom and now, as a small business owner makes me leery of adding stuff if I don't need it. But IF I think I'll use it, I do love having the right tool for the job! (Anyone needing proof of that can look at my car and then look at my wonderful Janome 15000 and see where my priorities are....ahem.)

I managed to work up the following graphics to illustrate my point. For a series of 4 inch blocks, it might seem like the answer is a circle or arc that reaches across the corners of that block, or whatever sized block.

The problem happens when you realize that the desired circle would have the same diameter at the diagonal of that square. In the case of the 4 inch square, having brought out my long neglected Pythagorean theorem, is that would be a circle measuring 5.66 inches. Which you aren't going to find a ruler in that size, not even an arc (arc rulers have the same sized curve as the circle they are named after).

The more likely measurement is to use an arc or circle (I prefer arcs when you go to larger sizes, BTW.) for twice the size of the block. This gives you the orange peel in a diagonal orientation which is the traditional orientation of the orange peel block.
  So for this 4 inch block, an 8 inch arc is used. Which is an easy sized ruler to source. My favorite on my high shank machines is the QPC #8. Westalee makes an 8 inch arc as well, for those with low shank machines.

But what if you don't necessarily want that diagonal orientation? Maybe you are going for more of a "continuous curves" design? The diagram below* shows some different options. In my second class with Craftsy, I show how you can play around with the rulers you may already have to test sizes and blocks on your quilts to see if they will work for the design you have in mind.
*Partial patterns shown for clarity's sake.
In the red, that is a curve close to what is drawn up in red in the first illustration, but it's not quite. It represents what a 5 inch arc might look like, but it won't quite make a perfect circular shape and you aren't likely to find a 5 inch arc. There's the Westalee Circles on Quilts template which gives a large range of circles with their rotating template, but I personally would find it tedious to do this design if I had to set the pin every time.

In blue you'll see how a larger arc or circular ruler might look going from corner to corner. You lose that rounded shape to that of a more squared off shape, but the effect is still pretty fabulous.

In the green are 4 inch circles. You can see that they dip in too far to work corner to corner, but would work in a diagonal overlap for 2 inch squares or for completing the entire orange peel within the 4 inch shape.


Whew! There's my exhaustive (exhausting?) explanation of what seems like a simple question. I hope this helped.


More Template Options for Low Shank Machines: Blue Dahlia

When it comes to quilting with rulers on sewing machines, Low shank machines are at a disadvantage as the lack of clearance behind the foot limits your choice of rulers. There's only one maker of 3mm quilting rulers......

Or at least there was only one! TopAnchor, my favorite maker of fancy, specialty rotating templates has begun having her popular designs cut in a 3mm thick version. I've used her 1/4 inch thick templates all along on my high shank Janomes and I love how easy it is to position the anchor post from the top side of the quilt and without pin tips sticking up. (Because if a pin sticks up, I'm going to be the one to put my hand on it.)

I set up one of our smaller low shank Janome machines (7050) with the Janome ruler foot combination and shot a video using the "Blue Dahlia". It's a bit long (22 minutes) and also gives a little peek around my new studio/classroom in our shop, newly relocated to 2414 Wards Rd. in Lynchburg VA.


I love that this option exists now! In the video I used the 6 inch version of the template. All of Janome's low shank machines are small machines with a regular sized harp space, so using the 9 inch template is a little harder to use. Not impossible, but harder. Certainly harder with a camera between me and the machine! But there are quite a few larger throat machines in other brands that have low shanks.


I show in the video how to make the double dahlia, but I have also done a triple dahlia years ago in bright colored fabric on linen (with the high shank version) that was absolutely stunning! I'll have to see if I can find it. The markings are on the template for both the single and double version. These templates are now available at Amy's Quilting Adventures.


Whew...nope, no dice on finding that design. I had to dive deep into the archives looking for it, so I'll just post this adorable pic of my now 10 year old at 4 years old in the dress and bloomers I made her back when I had a "mommy blog." Isn't she adorable? So twirly!

Quilting with Rulers: Dahlia Template

I got out a neglected, partially quilted project to try out a new size of the Dahlia template that we carry in the shop. It's a pretty striking batik panel in black and my favorite turquoise. I've been quilting on it with specialty templates by TopAnchor. We've had these rotating templates since the online shop first opened in the 9 and 12 inch sizes, but they recently released the new 6 inch size.


I shot a video while I used this template on the Janome 8900QPCSE in my shop, Sew Simple of Lynchburg and it was the first time I used my regular camera mount in my new studio area. I still need to tweak the lighting and the mount itself. It was twisted off to the side a little bit.

A note about videos: I was having trouble uploading the video without losing the quality. After getting quite frustrated and changing the file types, deleting and re-uploading, I discovered that my video quality settings had been changed with YouTube. This means YouTube was resizing (so to say) the video to a lesser quality.

I record in high def, and many people now have high def capable devices, so you might want to check your settings. You can do this by clicking the gear icon at the bottom right hand side of any YouTube video. It will show you a range of quality sizes and which one you are currently set on. (I think my setting got changed when using my phone which has a lesser quality resolution.)

I love these rotating templates from TopAnchor! They make fabulous designs without marking, have very clear markings on the templates to keep you on track, and the patented anchor post is easy to insert as you do it from the top of the quilt.

The only downside is that they are a full 1/4 inch thick so they are harder to use with a low-shank sewing machine. Not impossible, but definitely harder. Some of their templates are easier than others to position so they aren't behind the foot where there is little clearance.

With the addition of this new size dahlia template and the Celtic Knot templates from TopAnchor several months ago, I want to finish up this project since I'm starting to feel the burden of being overloaded with unfinished projects. So many ideas, so little time!

Celtic Knot Templates

I've been meaning to write about this new set of templates for a while but just hadn't the time to do them justice. I used a prototype in my Craftsy class "Quilting with Rulers on a Home Machine" (50% off link!) to demonstrate rotating templates and used the same template without the rotating pin for a whole block design as well.


The above is pretty cool, but using the rotating feature is even more cool! And you can offset the designs, and nest them within each other too! I really like these anchor pins, they don't have pins poking up where I'm guaranteed to poke myself.


This template is a lot like a big half circle, but has a hole drilled for a special rotating pin and feet at the ends of the curve to stop your stitching. Add in some handy markings and it allows you to make a great Celtic Knot design without math or marking.


There's a whole range of sizes: 12, 9, 6, and a 'pin-less' 3 inch template. The 3 inch template is cute. What is it that makes something so adorable when miniaturized? It still makes a Celtic Knot if you use the markings, but the template is too small for the special anchor post and pin.


I had to use a ruler to mark reference points so I could line up this little cutie within the knot design made by the 9 and 12 inch versions.


Then I used the markings for the template placement. There are metallic gold lines to help with the center and point placement. They show up really well under the lights of the sewing machine!


As I stitched, I used the green lines to reposition the template for the next pass of stitching. Without the anchor pin, I did need to be extra careful that the ruler didn't slip.


I mentioned that I used a prototype in my quilting with rulers class and I was able to suggest that 1/4 inch spacing lines should be marked around the edges of the template for greater usability when using the half circle or straight edge for other designs.  This makes the template really versatile and each size makes a precise half circle in that size. It's really awesome when a manufacturer listens to input on their products.

I'm now selling these Celtic Knot designs in my shop.

Time to Tidy the Studio

The new year always has me cleaning, organizing, and trying to get my world pulled together so I can tackle some great goals. This year is no different and I've got several big projects to tackle. Since my two biggest accomplishments of last year weren't even a glimmer this time in 2015 (My Craftsy class- Quilting with Rulers on a Home Machine (50% off link there!)and opening my online shop, Amy's Quilting Adventures, to sell my favorite supplies for ruler work and other tools), I'm extra motivated to prepare myself for whatever lies ahead!

 The first order of business was to corral my plethora of papers, pictures, and Post It notes. A quick trip to Staples and I brought home some pretty magazine holders in my favorite colors of turquoise and white to put next to my "inbox". I'm using them on their sides to hold files files and papers. (Got that idea from David Allen's Getting Things Done system) The Post Its were put into my bullet journal. Here's a video on the bullet journal. I can't ever stick with a pre-made planner, but I've gravitated to this from making to-do lists on far too many separate pieces of paper, Post-It's, and other notebooks. Here's a link to Bullet Journal Joy, who has a prettier, more artsy vibe. Both folks use some fancy notebooks, but I use a simple Walmart blank journal.

quilt studio honest craft room
Not too shabby.

Now that the papers and computer were taking up only half of my work surface, it was time to make sure I had space to iron and cut efficiently. I had two ironing surfaces and one was too big for the space, the other was too small. I made a new ironing board out of a piece of plywood 18x22 inches, a layer of batting, and some natural twill. After using my trusty staple gun to put it all together and pulling a 3/8ths inch staple out of my finger (Yeeeouch! Big oops.) I made it a pretty cover of (What else?) turquoise and white.


Now to get to my creative work! I did work on a sample using the TopAnchor Celtic Knot templates. I hope to have them available in the shop soon. Take a look see where I ran out of bobbin thread below. Less than an inch left to stitch and my bobbin comes up empty.


How about you? Are you getting organized? Have some great goals for yourself too, quilty or otherwise?

Quilting with Rulers on the Big Block Baby Quilt

Baby Abigail is smiling because her auntie is nearly done with her quilt. At least that's what I think she's saying.


I just had to do some ruler work and more detailed filler work on the solid triangle points. You can see in the picture below that I mark my corners when doing this work. Ninety degree corners are easier to estimate, but in triangle corners, I need a little help to know where to turn.


 I had originally decided to just do this triangle in the center of the four solid blue triangles, but I decided to have a little fun.

quilting with rulers with Westalee ruler foot

I used the 6 inch star from TopAnchor for the next one. I shot a video of some of this and will post in in the next couple of days.


I love how it turned out! The next one is getting a big letter 'A' in the center. I used a Bohin white mechanical pencil for marking on this dark blue.

Don't forget we're still in the middle of a blog hop featuring several Craftsy instructors. If you haven't entered my giveaway yet, click here and fill out the form to enter! A Westalee Ruler Foot Starter Kit is one prize and 3 rulers are in the second price pack.

Here are the blog hop stops:

Monday, December 7 
Jackie Kunkel  - Canton Village Quilt Works 
Kate Colleran - Seams Like a Dream   
Tuesday, December 8 
Wendy Gardiner - I sew  
Wednesday, December 9 
Maureen Cracknell - Maureen Cracknell Handmade 
Thursday, December 10 
Jan Newton - Newton Custom Interiors  
Friday, December 11 
Laura Nownes - See How We Sew  
Saturday, December 12 
Kelly Ashton - Kelly Quilter  
Sunday, December 13 
Lindsey Stephens - Poetry In Yarn 


I'm loving this big block baby quilt! So fast and easy to work up, though I did find I could use a bigger cutting ruler for some of these pieces. Have you done a big block quilt yet? Let me know in the comments. Feel free to share this post or the giveaway post itself!

Free Motion Quilting with Rulers Video: Baptist Fan Template Demo

Last week I shot a video demonstration of the TopAnchor Baptist Fan Rotating Template for the maker of these templates at their request. It's a bit of a tricky template for those of us who move the quilt instead of the machine to free motion quilt, but they were getting questions about using it with sit down long arms and since they use the frame mounted variety when developing their templates, they asked me to demo it.


I've told the company that I find it tricky, thus I wasn't sure I'd recommend the template for use with stationary machines, since this design can be done with other methods, but if you did a lot of this design, which is great for a cuddly quilt, you might find it an excellent help.

The closer to the center anchor point, the harder it is to use, but being able to use one template for this design is pretty awesome. If I were to use it, I'd start farther out from the center and if need be, use a different design to fill in the center.

For a frame mounted long arm, I bet this thing is awesome!

Now I'm off to go quilt on my ruler work sampler. I even have the new TopAnchor Celtic Knot template prototypes to play with. I can't wait to get these listed in the shop! I may offer them as a pre-sale option. I started this sampler for my Craftsy class, Quilting with Rulers on a Home Machine (25% off discount link there) and it is just ridiculous that I have yet to finish it!

By the way, I totally revamped the shop for easier navigation last week. I'd love to hear what you think of the new design.

Celtic Knot Templates!

I am so excited about these Celting Knot Templates from TopAnchor! I'm going to tease you with this picture until later this week as it's such a beautiful day here that we're taking the kids up to the Blue Ridge Parkway for some hiking and fun.

quilting with rulers celtic knot rotation template from TopAnchor


The bigger size is one I used in my Craftsy class (25% off discount link!) and it will be available towards the end of the month. You can't see it in this picture, but there are 1/4 inch markings along the straight side and the half circle, so it is very versatile!

Free Motion Quilting Practice: Feathers Top to Bottom

Yesterday I shot a video demo for the folks at TopAnchor Quilting Tools. They make these incredible rotating specialty templates for quilting with a long arm. Since I started using and teaching about using rulers and templates to quilt with stationary machines, many of their products have also been sold to users of (mostly high shank) sewing machines and sit-down long arms.

I showed how to use their Baptist Fan template. It's a very tricky template to use on a stationary machine, but they tell me that there have been plenty of quilters curious about how to use it on a stationary machine, so a video is one of the best ways to show it.

I'll be uploading that video to YouTube shortly, but in the meantime, I used the sample to do a bit of free motion quilting practice. I got home from work dead-dog tired. I love working at the Janome dealership, and am full of enthusiasm when I'm there, but I am an introvert and I kinda crash after a full day there.

free motion quilting feather practice
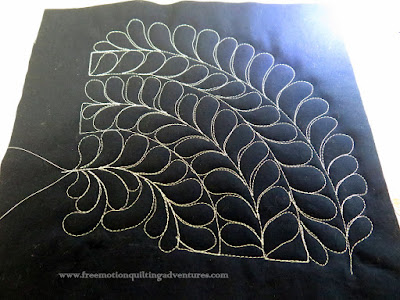
Those arcs are made with the Baptist Fan template

Doing some completely free quilting, no need for a finished project, helps fill my batteries! I grabbed the sample and began to use the stitched arcs as feather spines.


Free motion quilting practice feathers
Feathers, made from bottom to the top.

It wasn't long before I reached the top of a feather and decided I really need to practice stitching feathers from the top down. I always, always stitch my feathers from the bottom to the top. It means planning ahead to how you will get from the top of a plume to the bottom to finish out the other side. But I know there are talented quilters who can do feathers 'backwards' so I decided to give it a try.

practicing stitching feathers from top to bottom
First run of 'backwards' feathers, going from top to bottom of the spine.
In the picture above, my seam ripper is pointing down the feather in the direction I stitched. (No cute pointer hand this time; my son took it with him to Grandma's house!) The first plume wasn't bad as there was no other plume to fit it against. Then I was committed. It was a bit wonky after that, but like everything, it got better (mostly) with practice.

practice free motion quilting designs feather plumes
Not too bad. Everything gets better with practice.
The last two rows of plumes were stitched backwards as well. Some were pretty wonky, but it wasn't too horrible. I tried to picture in my mind what the whole plume looked like as I stitched. It was hard to keep from over-doing the lower curve of each plume and to get the area where the plume met the spine from being to wide and straight. But it was good practice.

I like to think of such practice as good exercise for my brain. I wrote about how quilting is good for preserving the gray matter in my newsletter that came out this past Tuesday. You are signed up for my newsletter, aren't you? You can sign up over on the right sidebar.

I'm sure some of you will wonder if I will carry the Baptist Fan template in my shop at Amy's Quilting Adventures. While I aim to provide a great collection of rulers and templates for ruler work, right now I'm not carrying it. As I said, it is very tricky and probably best suited to long arm systems (sit down or regular) but you can certainly buy it through TopAnchor.

My question to you is: What ways are you challenging yourself in your quilting practice? Are you trying new shapes, threads, designs? Maybe you are wanting to try ruler work (You should check out my class at Craftsy- Quilting with Rulers on a Home Machine!) or even try a new piecing technique.

Let me know in the comments what you are doing to stretch yourself when it comes to quilting or creativity.

Repairing Quilting Mistakes

I've finally got a new video for you. One of my regular readers asked to learn more about fixing mistakes. She appreciated that I freely admit making them, and wanted to see how I fix them.


The video has the added bonus of letting you hear what happens when a bobbin isn't wound properly and the end comes undone while stitching. Operator error, most likely.


Here's the finished product. Can you see the repair? Me neither and that's with contrasting thread. I've also borrowed my 5 year-old's favorite new toy, a pointer finger on a stick. I think I might have to use it instead of my seam ripper!

Of Dahlias and Deadlines

Fall showed up yesterday and today has been absolutely beautiful! Seems like such a shame to spend any of it at the grocery store. But that's my usual Monday activity. I did get some stitching done as I worked to upload products into my online shop.

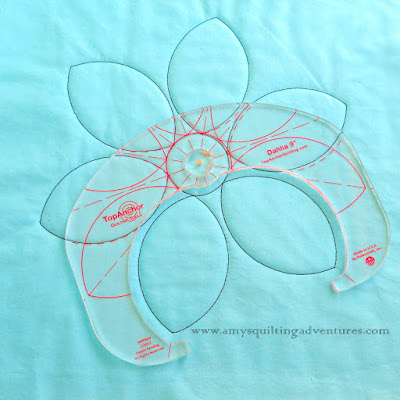
Dahlia template

Since I want to make sure my shop has the best info out there on a variety of rulers, I figured I better stitch out samples for some of the more unusual templates.


Here's what one full repeat of the 9 inch Dahlia template from TopAnchor Quilting Tools looks like, above. Below is after I've stitched the second set of patterns. This thing is fun!

Quilting with rulers dahlia

I even shot a short video as I stitched. I'll get it edited and up later this week. Don't forget to stop in here Wednesday when Christa Watson's blog hop makes a stop. I'm doing a giveaway! Technically, I'm doing 2 giveaways. Here's her Blog Hop Schedule.

Now, one of the reasons I started blogging was to share the quilting I was doing, but another was for the accountability it gave me to finish projects. Completing what I start is a struggle for me and there's something about having an online community of friends to report to that helps me get things done. So many quilty ideas, so little time.

You've heard me mention my online store several times here and I have to admit, I keep picking away at it, but not pushing too hard. But I've also had a lot of good feedback from readers and students from my Craftsy class, Quilting with Rulers on a Home Machine, that say they are ready to shop. That's a 25% off discount link, BTW.

So I'm putting my foot down and giving myself a hard, solid, deadline. With you all as my witness, I will open my shop Friday. Yep. Gonna do it. Maybe. I think I can, I think I can.


Free Motion Quilting with Rulers: Star Template

It's been a while since I've posted a new video and that's a shame because they've been pretty popular and I've been sitting on this footage for a while. Shame on me.

I'm quilting a six inch star, using a specialty template from Top Anchor Quilting Tools. These templates are so fun as they yield a great uniform shape, without marking.


I accidentally used the template upside down on the anchor post, but it works just the same, though right side up would have allowed me to line up the registration lines on the template more accurately.


I didn't put any sandpaper dots or other non-slip aid on this ruler and had no issues of slipping. Though if I had those dots or in this case "sandpaper anchors" on the template, I bet I would have noticed sooner that the template was upside down!


Aren't these cute? I haven't yet stuck these to my templates, but I suspect that the irregular, angular shape of these anchors will help grip the quilt top better than an equivalent rounded sandpaper dot.

Now I am off to get more quilting done! Gotta finish!

Review: SewEzi Portable Table

For my trip to demo templates at the AQS show in Lancaster for Top Anchor Quilting Tools, I wanted a table that was at a comfortable height, sturdy enough to not bounce while free motion quilting, gave me a decent space to hold my samples, and was easy to carry into the convention center.

I decided to give the SewEzi Portable Table a try. I had seen another quilter using one at a meeting of the Virginia Consortium of Quilters. (Cool guild name, huh?) She said she loved it.

I didn't have much time to order the table and get it shipped to my house, but it came in plenty of time. I think it took less than a week to arrive along with the insert for my Janome 8200. There was a little assembly required to get the recessed platform for the machine put together, but it was easy enough to do.

SewEzi

There are handy handles at the top and along one side to make carrying easy. The case is constructed so that the handles aren't covered up.


At the bottom are these nifty wheels. They look like skateboard wheels and allow you to pull or push the table along from the top handle.


Above is a storage compartment in the case to take advantage of the space above the machine platform. Below, on the other side is a flat pocket for carrying the insert.


Everything folds up neatly. I found the locking mechanism for the legs very stiff and hard to lock and unlock, but a little WD40 may help with that. It's also an indication that they won't be too loose anytime soon.


My machine fit the table and insert nearly perfectly! I did adjust the platform a little lower than the directions specified for my machine. That was easily done using the various thickness of hard plastic washers included for the purpose.

SewEzi portable table and Janome 8200

The table's surface is nice and slick, though I did use my queen-sized Supreme Slider while quilting just to help where the insert and machine joined and to cover the two support screws to the left of the machine opening. The table is pretty small for using to quilt more than a table runner or topper. It's perfect for samples or piecing. Using regular tables against it to expand the surface should be useful for supporting a larger quilt. I also found it the perfect height for sitting in a regular chair at the quilt show. I had my own sewing chair in the car since I hate being too low or too high at the table while machine quilting, but I didn't need to use it.


There are all sorts of accessories for the table, including a tray for tools and such. I haven't bought any of those. There's a cross support on the left pair of legs that would be a great spot to make a hanging pocket for supplies.


A recessed area for a cup is at the right corner of the table. Perfect for my souvenir glass from the historic Revere Tavern. My Mom's cousin and his wife took me out to eat there while I was at Lancaster. It was begun by a relative of Paul Revere back in 1730. The food was excellent!


The SewEzi table was everything I hoped for. While not entirely wiggle-free, it was perfectly steady for sewing on. Before the show, I gave it a test run at high speeds and while it did shimmy a bit, it was at speeds above what I use for free motion quilting. If you were stitching long lines at high speeds, or are a speedy piecer, it might be a little bouncy. But I think that there's a good balance between sturdiness and portability.

There's a more heavy-duty table available, but it doesn't have the handy wheels. It's also quite outside my price range. The portable SewEzi table cost me $245 plus shipping which was an additional $35. I think it's money well spent. Now I will have a great table for teaching at different locations.

If you travel a bit with your machine, I can say I highly recommend the Sew Ezi portable table. These opinions are my own and I did not receive any compensation or discount from the Sew Ezi company for this review.

Bernina Ruler Foot

I got back from the AQS Quilt Show in Lancaster last night and while I'm still getting life back to normal, I had to hurry and share this with you:

new ruler foot for Bernina sewing machines
Sorry for the poor picture.
 It's the new ruler foot from Bernina! Yes, it's on its way and made a little debut at the show in the Bernina booth. It was as we had suspected, made for the Bernina longarm, but will fit onto the Bernina sewing machines.

Ruler foot for Berninas

The Bernina representative told me it will be available in April. I got this sneak peek at it at the show as they had the long arm there. It's a nicely done foot, smooth and round with the desired 1/4 inch from the needle to the outside edge. It also has a small cutout for better visibility in front of the needle.

The interest in using rulers and templates with free motion quilting on a domestic sewing machine was incredible! Of course the need for a foot was a bit of a disappointment when I had all of those nifty templates at the ready from Top Anchor Quilting Tools. Especially for those who have non-Janome machines. I made sure to tell folks to check out the Westalee foot or to see if their machine is compatible with the Janome ruler foot and to pester their dealers for a ruler foot. I will have reviews of the final version of the Westalee foot sometime this week.

A Brother dealer made sure to come down and ask about buying the templates for her shop. She said all of her employees at the show kept coming down to our booth to look at the templates. She also said the Janome Ruler Foot combination (Janome Convertible Free Motion Quilt Foot Set (In the appropriate high or low shank) plus the Frame Quilting Feet Set ) worked on their Brother machines.

I was so happy to meet several blog readers at the show! Thanks for coming by and saying "hi". So nice to put some faces to your names. Especially one who gave me a hug and some well-timed words of praise when I was visiting the Janome booth! (That was awesome!)

Now I must go put my house back in order. Seems like while the cat was away, the mice played, while papa bear did some sanding in the house and there's a lovely layer of dust.....

AQS Lancaster Quilts

Sorry for the delay in posting these last few days. I've been working hard on the banner for Top Anchor Quilting Tools and then I left to come to Lancaster PA for the AQS show.


I haven't gotten to see much of the actual show, since I've been super busy demonstrating how to use long arm rulers on my domestic sewing machine. So many quilters are blown away with the idea of ruler work.

Several weeks before, I contacted a few people at Janome to let them know I'd be at the show demo'ing on my new machine, Janome 8200 and that the technique I used required the Janome Convertible Free Motion Foot Set and the ruler foot from the Frame Quilting Foot Set and would they please make sure that any Janome booths had those feet in stock. I was told they would. By this afternoon, I was told by quilters that the Janome and Elna booths were both out of those feet. Quilters are loving being able to do ruler work on their domestic sewing machine or sit-down long arm.

I snuck away this afternoon and made it down one aisle of show quilts before returning to the booth. Happily, it was the row that a quilt each from Margaret Solomon-Gunn and Bethanne Nemish were hung. The other quilts were wonderful of course, but these gals do amazing longarm work and have inspired my quilting over the years though I've never met them.


Words nor pictures do these quilts justice! Amazing quilting and fine detail work. I want to be like them when I grow up, but without the long arm. Though I'm not sure I have it in me to do such meticulous detail. Below, you can see the beaded piping that Bethanne pieced into her quilt. Those are beads stitched inside a bias strip.


I am exhausted from doing so much chatting with so many wonderful, friendly, and enthusiastic quilters! I hope to post more quilts from the show over the next few days.