Free Motion and Custom Curves

Amy's free motion quilting adventures, ruler work

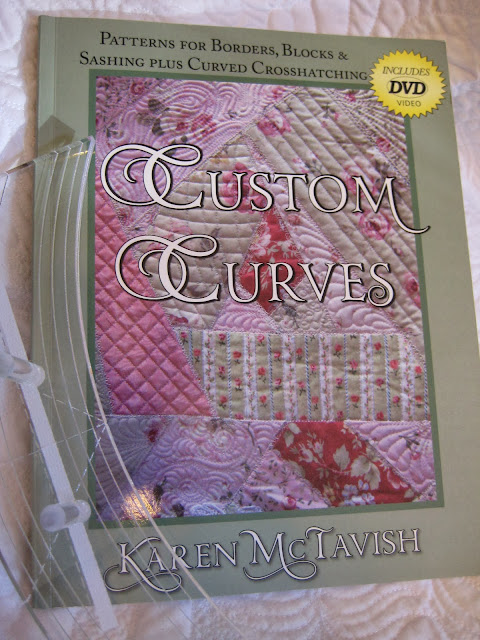
I am so happy to have my new Fine Line Rulers and to now have a nice variety of ruler to use for ruler worked free motion quilting designs. One of the big reasons I am so excited is that I feel like I can finally take good advantage of the tips and designs in Karen McTavish's latest book, Custom Curves .

Custom Curves, Karen Mctavish, free motion ruler work

I have had this book for some time, and while I had been doing some ruler work, I didn't have a good ruler for curved cross hatching. While I did have the small size of the double curve ruler featured in the book, it was almost too small for the designs I wanted to do.

Custom Curves, Karen Mctavish, free motion ruler work

 I thought at first when I did ruler work, that I needed small rulers since I had a small machine. That is true to some extent, but the rulers are best used to the left or in front of the needle where there is more room for the ruler. If the design or block you are working on is bigger than the ruler, it is harder to work with. The more you have to slide a ruler down to continue a line, the more obvious any little wiggle you might stitch.

One tip though is the ruler shouldn't be bigger that your quilting surface. Having your machine set into a table is best, next is having the biggest extension table available for your machine. You don't want the ruler to tip while you're stitching.

I will post in the next few days a few more tips and recommendations for buying long arm rulers for free motion ruler work on a domestic sewing machine.

Want to learn more? Make sure to visit my page on using long arm rulers on a stationary machine.

Have a question? Ask in the comments below.

Thanks for reading.

Video: Curved Cross Hatching with Fine Line Rulers


Here's the video I took while playing around with my Fine Line Rulers by Accents in Design, complete with a little auditory visit from my 3 year-old!


I am so excited about the design opportunities for quilting with rulers! I've even set up a new board on Pinterest (Quilting Designs with Rulers) for all of the beautiful designs I've seen that use rulers.

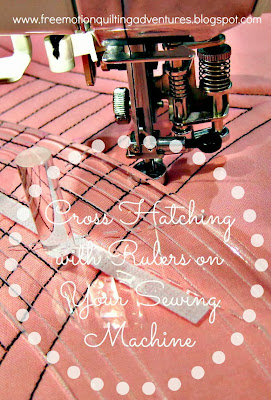
free motion quilting cross hatching with rulers

I am on a mission to find out if there's a foot available for brands other than Janome that is perfect for ruler work. It can be done with a regulare free motion foot set a little higher from the surface of the quilt, but it's a little more tricky that way. I hope to find out more info from some of the manufacturers' teachers at the Quilt and Sew Expo later this week.

Have you tried ruler work on a non-Janome machine? What kind of foot did you use?

New Rulers for Free Motion Quilting

My Fine Line rulers arrived Tuesday and I finally got a little time to play with them. Love them! From left to right: 7.5" half circle, 8" Straight, and 10" Continuous Curve ruler.

Fine line rulers

I ordered these over the phone so I got to talk to Carol Olson, the designer of these rulers. She was very nice and helpful. She also has a video on these rulers using a Janome 6600 (same model as mine) and I noticed that she didn't have a ruler toe on her machine. I told her she might want to get one!


First I marked a few registration lines with my air erasable purple pen. Then I used the registration lines I drew and the marks on the ruler (10 inch continuous curve) to make a frame for some curved cross hatching.

free motion quilting with Fine Line brand long arm rulers

 Those orginal registration lines are the only markings used for this bit of quilting. These rulers have a pair of pegs to help you hold the ruler with the sides of your fingers. The pegs were close enough I didn't have to stretch my fingers to use them and they seemed solidly attached. They were in no danger of running into the needle area of my machine either, plenty of clearance.

free motion quilting with Fine Line brand long arm rulers

See that white line above, going down the center of the ruler? These rulers come with a heavy duty strip of hook-side velcro attached to keep the ruler from sliding around. I had no slippage of the rulers as I quilted.

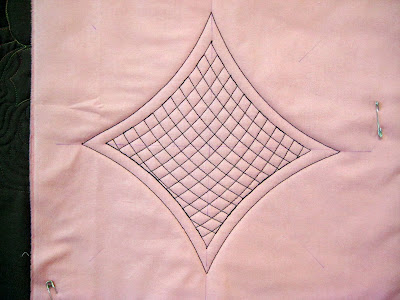
curved cross hatching, free motion

Not too shabby if I do say so myself! I really enjoyed the curved ruler. The etched lines in the ruler were easy to see and to line up with the previous line of stitching.

free motion curved cross hatching on a sewing machine

Then I drew out some lines with a 24 inch rotary cutting ruler to simulate sashing. I then used the 7.5 half circle to make an egg and dart design. This ruler is maybe a bit large for this design and I had to draw a secondary registration line to use as a guide for my first set of curves, but then I used that stitching to guide the second pass. A smaller ruler would have worked better.

I still didn't have any trouble with feeling like the ruler was too large for my machine, just for that design. In fact, even the 10" curve wasn't too big. I do know I will order the 12" straight ruler, a smaller half-circle, and possibly the 12.5" curved ruler.

egg and dart sashing, no mark

I took a video while doing the curved cross hatching and will get that posted soon. (The video is up! Free Motion Curved Cross Hatching )I am excited about the design opportunities for ruler work on domestic sewing machines and the big sit-down long arm machines!

Another handy side benefit of using the rulers is that it helps keep the top flat as you move the quilt. More on that later.

I can see that if you have a substantial sized quilt under the machine, there will be less room to manipulate a ruler, but good design choices will help with that. I particularly like the idea of using the half circle for swags  and the straight ruler for piano keys or beadboard to be combined in an outer border where the quilt size won't be an issue.

I have linked this post to Leah Day's  Free Motion Friday and to Nina Marie's Off the Wall Friday.

See a few of my thoughts on choosing long arm rulers for your sit down machine. And don't forget to look at more of my posts on ruler work, or click the tab at the top of the page. As with nearly all good long arm rulers, they cost a pretty penny, but unlike the others, the Fine Line rulers are ready to go sew! No need to stick an anti-slip thingy onto the bottom and the pegs are an additional benefit for those of us who move the quilt instead of the machine!

Full disclosure: While I recieved no compensation for this post and review, I did get a discount on the rulers as I am choosing rulers to recommend to the quilt shop where I will be teaching free motion quilting starting in November. They will be stocking a selection of these rulers.

For more information about the foot needed for using rulers on your Janome or Janome compatible machine, see my ruler toe update. Also see the page for Using Long Arm Rulers on a Stationary Machine, above.

Improve Your Free Motion Quilting by Drawing

I've said it before and other teachers of free motion quilting have said it too:

draw out those free motion quilting designs

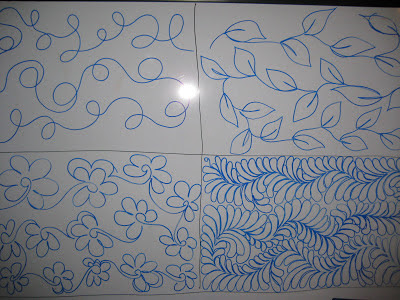
 Drawing will improve your FMQ skills! I ignored this advice at first because I wanted to get to stitching. But then I had a bunch of down time while the hubby was sick and I took to drawing the designs.

Did you know this is one of my most pinned images on Pinterest? Of all the things?! Funny.

 Before doing much drawing, dated March 12, 2011:

Add caption

Not too horrible, I know, but below was just a few months after starting to doodle those designs:

free motion feathers

Much better, I think you'll agree! Then I started drawing designs whenever and wherever I could! (Gee has it only been 30 months ago?)

drawing quilting designs

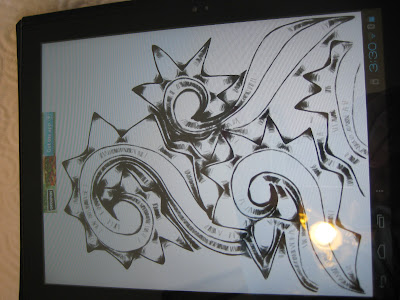
Oooh! Touch screen tablet with a drawing app. Fun and with special effects too!

edrawing free motion quilting designs

edrawing free motion quilting designs

 Big dry erase board for homeschooling and notes and such? Mine!

Drawing free motion quilting designs

 And you'll find that you actually stitch better than you can draw. Trust me.

Drawing free motion quilting designs

Not only do you build up muscle memory for the motions of the designs, but you also learn how to work yourself into and out of different sized areas and corners and such.

Check out this video from Dusty and Stephanie Farrell. My hubby once asked (before seeing this tool) if I should draw using something like this and I thought it was a good idea, but never followed up on it.


You might find it handy. But no matter how you do it, just draw out those designs! I guarantee you'll see an improvement in your quilting.

Quilt and Sew Expo

Next week I'll be attending the Sew and Quilt Expo, October 4-5 in Fredericksburg, VA to help out one of my favorite quilt shops, Thread Runs Through It.  I'll be demonstrating the new Gammill Charm, a sit down long arm quilting machine. This big machine is a powerhouse and a lot of fun to quilt on.


I'm looking forward to checking out all the vendor booths to see what they have and to fill my head with all kind of eye-candy. There are a ton of classes offered too. There are some pretty amazing long arm classes offered and Threads Run Through It will be providing 20 Gammills for the hands-on classes. There are some free motion quilting classes too, one is already filled. I'm planning on taking a class by Dusty Farrell on gadgets and rulers for quilters (both domestic and longarm). Most of the time I will be in the TRTI booth, stitching, chatting, and helping interested quilters try this new machine.

I  am hoping there will be plenty of vendors with thread!  I could use more colors as always. I'm especially wanting to find someone carrying a particular Krenik thread. It's suppose to look a lot like a string of beads, even though it's mostly some form of knotted mylar from what I can see online. Looks like it might be fun for free motion couching.

I'm also hoping to pick up some new rulers for doing ruler work. While I was disappointed that Quilter's Rule wouldn't have a booth there, Dusty Farrell will have his line of rulers ther and I will be taking a look to see if some of them would be useful on a domestic sewing machine or even the big sit-down long arm machines.

I am also hoping to track down some of the sewing machine reps and educators of the various brands and see if there are ruler toes/feet available for other brands of machine. I did find a generic Ruler Foot for a high shank machine on Amazon, but couldn't find any manufacturer's info on it to see if there's a low-shank version available. I do think buying the Janome convertible free motion foot set for either a low or high shank machine and the Frame Quilting set for the 1600P to get the ruler toe is a better bet and comes out to about the same price.

In the meantime, I've got two quilts to bind for the Expo and some unfinished projects to work on. I hope you are getting to do some free motion quilting too.

If you are going to the Expo, let me know and we'll try to meet up.

Blue Bobbins!


 I've written about how I feel that using genuine Janome bobbins in my Janome sewing machines gives me better results in May Your Bobbins be Smooth and also shared how I use the pink Janome bobbins to help organize the threads in my bobbins.

Now they have blue bobbins !

Yay! Now I can use a different color for my extra fine threads like Bottom line and the occasional silk thread.

I already keep my basic sewing threads on the clear bobbins and my remaining generic bobbins and the threads I use most when machine quilting are on the pink "Cherry Blossom" bobbins.

Did you know that September is National Sewing Month? It's a good time to look around for some good deals on sewing stuff.

Fall Mini Quilt

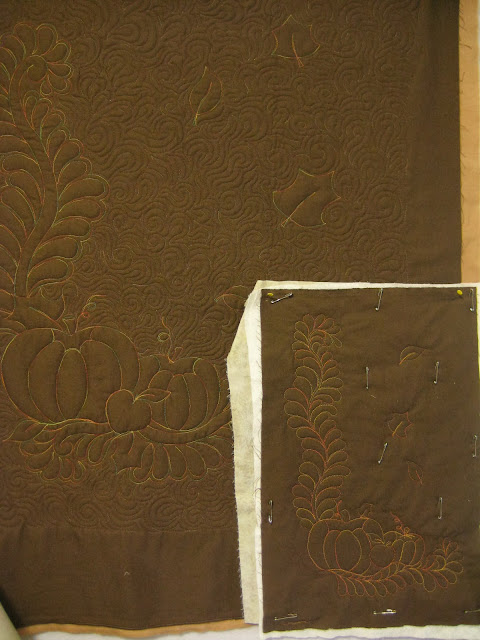
I started a mini quilt today, based on the fall wall hanging I quilted up on the Gammill Charm at my favorite local quilt shop.

free motion quilted fall quilt

It's up on the design wall with it's larger counterpart and the words "mini-me" keep popping into my head. Maybe it's more like quilt and mini-quilt, but still....

free motion quilted fall quilt

I need to quilt another motif or feather in the bottom left corner and then switch threads and do the background fill.  I used a 30wt Sulky cotton Bleandable thread in a variagated tan, orange, and yellow for the pumpkin motifs, feathers and leaves. This lets the stitching really pop on the brown fabric. I have to use a large 100/16 topstitching needle for this thread and it stitches beautifully. In the bobbin, I used a brown Isacord thread in the bobbin and the tension was beautiful at 4.5.

free motion quilted fall quilt


It was a fun project to work on after a very busy week. I hope next week is a little more normal, though sometimes I think the 'busy' is the start of a new 'normal'.

I hope to get some new rulers in the mail early next week and I am looking forward to trying them out for some free motion ruler work.

I'm linking this post with Leah Day's Free Motion Friday.

Forgive the less than stellar pics I took these photos at night.

Quilting With Long Arm Rulers on a Stationary Machine

quilting with long arm rulers on a domestic sewing machine

I've been getting a lot of questions about using long arm rulers on a stationary machine, whether it be a domestic sewing machine or on one of the new sit-down long arm machines. I have now added a page at the top of the blog with links to all the posts on this subject.

While it does have one post on choosing rulers to use on your sewing machine, I am getting some new rulers soon and will be posting an updated post with more info on these rulers soon.

I'm hoping this will be helpful to have these posts grouped together in one spot. Feel free to ask questions or make a comment in the comments section below.


Quilty News

I'm back from my trip to Ohio to provide a beautiful flower girl for my cousin's wedding. We traveled through the heart of Ohio's Amish country, which always makes me eager to get my yard and garden in tip-top condition and start a more traditional style quilt. This beautiful girl nearly stole the show with her smile and flower petal tossing! Why, oh why, didn't I get it on video?


We stopped in at Lehman's, famous for it's old-fashioned and non-electric quality goods. We bought a bigger cast iron skillet. With the kids growing, I had been splitting certain dishes between two 10 inch skillets. Now I have a giant 14 inch pan gracing my stove top. (I love cooking with cast iron!)

Lehman's sells a Janome treadle! Wonder if I am coordinated enough to operate the treadle and free motion quilt at the same time?Janome Treadle Machine
We got home and found out that my hubby had the day off on the following day. As much as I longed to spend some extra time with him, I ran off to Threads Run Through It to quilt on the Gammill Charm. I will be demonstrating this machine for them at the Sewing and Quilting Expo in Fredericksburg, VA in October. I will be there October 4 and 5, if anybody who reads here wants to meet up.

Since I will be showing how well the Charm will quilt, and such a big machine is great for big quilts, I wanted to stitch something other than just a sample. The shop is about 40 minutes away, so I also wanted to do something I could finish in one visit. I decided to do a fall themed whole cloth wall quilt.


Feathered Fall Free Motion

From start to finish this 30x35 inch piece took about 4.5 hours, including the few markings I used in the composition. And I didn't need to rip out any stitches! Miracle of miracles. Other than doing my free motion quilting in the middle of a quilt shop and in front of quite a few people, it was a lot of fun.

I have a promised post in the works on choosing long arm rulers for use on sit-down/domestic machines coming up later this week and also more pics and info from my trip to the quilt shop. I hope you are all having a lovely time with whatever creative and crafty skills you love to use!

The Love Birds Are Late


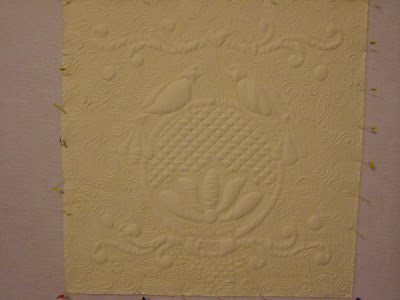
I finished quilting the wholecloth wall quilt for my cousin's wedding, but the day before we left was a seriously busy day and I just gave up on it. I know my cousin will not mind getting it in the mail in about a week.

Love Birds, a Wedding Whole Cloth Quilt

I really like how it turned out. I'd like to tweak the pattern a little bit, adjusting a few spots. I think I know what I will be giving most of the newly weds of my accquaintance!

I did a few videos of the quilting of this piece. A video of the cross hatching I did with a long arm ruler is already up on the previous post and I will get a video of doing some of the background fills up as soon as I get home.

I'm linking up with Leah Day's Free Motion Fridays and Nina Marie's Off the Wall Friday (even if this piece is still on the wall.)

Cross-hatching Ruler Work on Sewing Machine

I've posted a new video showing some free motion ruler work I did while cross hatching an area on my latest quilt.


I've finished quilting the quilt, except for the binding, and hope to get pics of it up on Friday. Right now, we're heading off to the wedding.

A Foot Workout

I've really been working my feet in the last few days.

Not my feet, but those of my sewing machine!

I wanted to make a skirt for my daughter's seventh birthday, since I couldn't find anything in the stores appropriate for a little girl, in my opinion.

We planned a butterfly themed party and I had found a shirt with butterflies and decided to make a ruffled skirt to go with the shirt.

Post it seam guide

If you make garments, you know that the standard clothes seam allowance is 5/8 of an inch. To help guide my seam, I placed a partial pad of sticky notes on the bed of the machine. I use more like a 1/2 inch seam, and it's handy to have that guide.

narrow hemming foot

 I also used my narrow hemming foot. I have a love/hate relationship with this foot. (I forgot to take a pic while it was on the machine) The fabric for the skirt was a voile cotton and was a bit thin. It hemmed mostly ok, but in some areas, the raw edge didn't get folded under all the way. I simply turned the hem under again and re-stitched. (I also used the ditch quilting foot (not shown) to guide that stitching so it would be a uniform distance from the edge of the skirt.)

overcast or overedge foot

 I zigzagged the raw edges of the side skirt and underskirt seams, using the overcasting foot, above. The foot keeps the zigzag stitches from rolling the edges up as it stitches.

Janome ruffler attachment

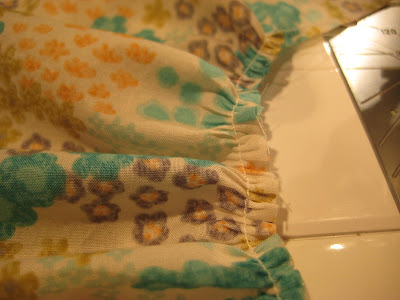
 Then there's the beast of a foot, the ruffler attachment. This takes a bit of trial and error to get the fabric ruffled at the right rate, but for a ruffled skirt, it's awesome!

even gathers using ruffler attachment

For working with ruffles, I work with the skirt in the flat, getting the ruffle on before sewing the side seams.


Then it's time for the waistband. Since I stitched an underskirt onto this nearly sheer voile, I used that as the facing for the band. So all I needed to do was stitch a seam to encase the elastic. I used 3/4 elastic, so I used this guide attachment to keep everything even and straight. It's not exactly necessary, but helpful.

seam guide

And here's the finished skirt on my butterfly birthday girl! I think the skirt came out great. It maybe needed a little more twirl factor, but she was pleased. I liked that I didn't have a bunch of folks ask if I made it. Unless I've made something pretty unique, when it comes to garments, to be asked that means to me that I've done some sloppy work.

finished skirt

 Good thing my machine can't speak to me or it'd be saying "My feet are tired!". Now I can get back to quilting on the wholecloth wall hanging I designed as a wedding gift. We leave for the wedding on Thursday!


Wedding Whole Cloth

Happy Friday! And it's a happy one for me as the hubby had gone out of town for work and was involved in an accident. He didn't get hurt, praise God, but had to stay gone two extra nights. He came back early this morning, happy day!

After showing you the applique project I was working on earlier this week, I had to stop to get started on a wedding gift for a cousin of mine. I designed a whole cloth wall hanging the old fashioned way, by hand instead of on the computer like the applique design. So much erasing! Actually, I had thought of it being a quilted pillow, but after thinking about her cats' antics, I decided a wall piece would be safer.

original wholecloth design

Above, I have finished the design and have gone over the final lines with a Sharpie in preparation for making a mirror image tracing. You should have seen all the stray and discarded pencil lines there were before I started erasing them.


There's a full-width version, above, and now to transfer the design to the cotton sateen I will be using.

marking the whole cloth design

 Using a dark Sharpie on the pattern allowed me to see the lines very clearly even without using a light table. That funny rectangular shape will hold the date of the wedding. I had originally designed a traditional feathered wreath with the doves at the top, but I realized that the feathers and doves would blend together too well and wouldn't 'pop'.


I started some stitching and I can already see that the wool batting and the design are going to work well together to give this piece some nice textural interest.


I will be quilting very densely around the doves, ring, and scroll work. Then I will play with some fun fillers. Following all these marked lines is not my favorite quilting activity, but I wasn't about to free hand such a symmetrical design.


I do have to remind myself that it will look much better after the markings have been removed with a water bath. Above, I didn't stitch all the way between the first two petals of the flower, but decided it looked better stitched all the way down, so I will have to go back and stitch that line on the left.

free motion quilting faux trapunto

Just with some light echoing the flower is beginning to pop. I will be doing some ruler work on this piece just like the big boy (girl) long armers do. I really like using long arm rulers on my domestic sewing machine.

My hubby came home with a $5 flatbed scanner he picked up at Goodwill, so there's a chance I will make this into an actual pattern to share/sell.

I'm linking this post up with Nina Marie's Off the Wall Friday and Leah Day's Free Motion Friday. Then it's time to get back to stitching, this time I've got a skirt to make for my favorite birthday girl! I'm not much of a garment sewer, but I am so glad I can make my sweet Boo a decent twirly skirt and an occasional dress. What clothing that is available for a size 7 girl these days is not pretty.

Applique Design and Stashed Treasure

I hope you've had a lovely Labor Day weekend if you live in the states. Poor hubby worked, but the kids and I decided to take a day off from school. Monday afternoon did find us laboriously cleaning out a closet that holds most of our arts and crafts supplies, games and puzzles. What a mess!

original applique design in progress

I've turned my hand to trying some fairly traditional applique. I think applique work might give my free motion quilting skills a better chance to shine. I am working on a wall quilt to hang at the quilt shop (Threads Run Through It, Phenix VA) that wants to promote me as a quilter for hire and where I will begin teaching free motion quilting classes this winter.


I am learning to use a graphics program on the  computer to design the applique. It's a bit of a steep learning curve, but I'm starting to get the hang of it. Above is the first flower of the design. I haven't quite decided what background fabric to use yet. Maybe something lighter than what it's sitting on right now.

preparing applique shapes

Preparing the shapes. This little iron is so handy for turning the edges under! I nearly tore my stash and storage area up, trying to find the thing. I could visualize the basket it was in, along with other items in the basket. But could not find the basket!

Turns out, the basket was inside a nearly empty tote. I did come across several nice pieces of fabric I had forgotten about as I searched. Amazing how I can find treasure just by stirring the stash occasionally!

I challenge you to stir through your fabric if you've neglected it for a while and see what treasures you can come up with!