Quilting with Rulers: Feather Template

I've had several requests from students in my Craftsy classes asking about using templates to make feathers. I kept meaning to do a post and a video on the subject and finally got it done.

feather template for ruler work


It's hard to give a good unbiased review of using this template or others like it as I prefer to make my feathers free hand. I definitely think that a quilter should continue to work on learning to stitch feathers without a template, but the template could be a good tool to help make them in the meantime.


I only have one size of feather template though Westalee makes them in at least 4 sizes. Having multiple sizes could help give the needed range of sizes and shapes needed for quilting feathers with templates, though spendy. A single size can be manipulated to create some variation in the size and shape.

Using a straight spine can make it much easier to place the template evenly. I used a curved spine and that made it much more difficult to place the template and make the plumes meet the spine in an elegant way.

I think I'm on the fence about this template. As I stated in the video, if I couldn't make feathers free hand, I might love it. I do like the Feather Wreath template I sell from TopAnchor as it makes a perfectly spaced and shaped round feather wreath and has an anchoring system that I prefer over that of similar rotating templates from the maker of this feather template, but it's only suitable for high shank machines and long arms of all types.

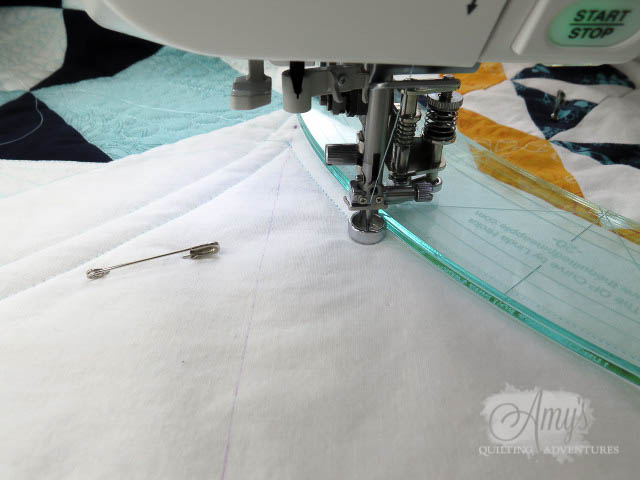
I used the Janome foot with this template and based on some comments I've gotten recently on a few of my videos, some may give me flak for this. The Janome foot works just fine with these templates. I think there are some 'marketing' factors playing into some of those comments....to put it kindly without mentioning details. (To put it bluntly....don't come into "my house" to bash my efforts in order to promote your own classes, products, or those of someone else even if you're a very happy customer....use your own platform, blog, site.)

(In case it sounds odd that I put this little disclaimer above, I did get exactly the type of comment I was warning against, but they left it on a previous post.)

I don't have this template listed in my shop, though I do have maybe 2 of them in the 4.5mm thickness that I can sell as a custom order if somebody wants these and can order more. This is definitely a shape that those using low shank machines need to get in the 3mm thickness.

I hope this video helps those who have been wondering about this template. Let me know in the comments if you've tried it or want to try it. Got quilting friends that would like this? Feel free to share, pin, etc. giving credit where credit is due.

Keep on quilting.

Happy Anniversary!

Yesterday was a pretty big milestone for me. It was the one year anniversary of the release of my first Craftsy class; Quilting with Rulers on a Home Machine.

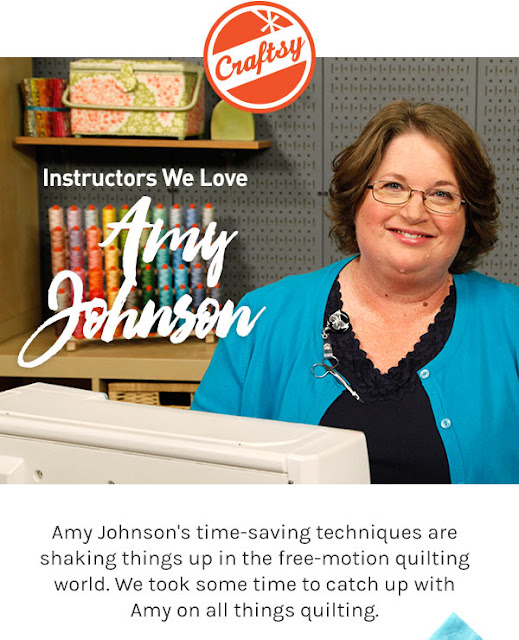
Amy Johnson Craftsy instructor
Image courtesy of Craftsy.com


My world has changed so much in this past year, that I can hardly believe it's only been a year. The week before the class came out, I was in San Antonio, Texas at Janome Institute. I was there as Mr. Heckman's representative, who had been the owner of Sew Simple until I bought it just this past June. I set myself a goal to be an actual Janome dealer before returning to the next Institute to be held in August of 2017. Goal achieved.

Shortly after the class came out, I opened my online shop to serve as a one-stop shop for all the different rulers I liked to use plus other tools I found helpful for my quilting. My goal was to provide the kind of expert knowledge of ruler work and customer service that would be nearly impossible for others to provide. Goal achieved.

Another goal was to create a follow-up class with Craftsy. Creative Quilting with Rulers; More Techniques and Motifs was released in April this year. Goal achieved.

So three big goals accomplished, but there's so much on my to-do list that it's hard to remember that I am doing pretty cool work. So I'm celebrating by writing these items down and sharing them with you.

You all have been very instrumental to my success. I just checked my first class and it has a staggering 12,209 students enrolled! That's an average of 33.4 people each day and that is absolutely amazing.

If you've enjoyed my class(es) and have other quilting friends who you think would enjoy them, don't forget to share this instructor affiliate link that will allow them to see the trailers for the classes but to also get them at half price anytime: Amy's classes.

One of the things I get asked in my class is questions about using feather templates to make feathers. I worked on a video for this yesterday and hope to have it edited and posted soon.


I know I haven't been posting as regularly and I do want to get back to it because not only do I love sharing here, but also not blogging is a good indicator that I haven't been doing much quilting.

So back to achieving goals: What goals have you achieved that you tend to forget in the hustle and bustle of everyday life? Feel free to share them here if you'd like.

Sanity Stitching: Paisleys

What a week! I had a rocky start early Monday morning, with a visit to the ER. I was diagnosed with an ovarian cyst and to add insult to injury, a stress induced episode of swollen hands much like an allergy response.

Monday was also my eldest son's first day at a new school. Poor kid was sent off by a wonderful neighbor instead of his mom. Praise God for good neighbors! He did fine though and is liking his new school.

paisley quilting design

Tuesday I resolved to try to take better care of myself and try to reduce my stress levels. I started off with some walking. Having the kids all in school has helped too.


Then I did some selfish sewing, or as I call it, sanity stitching. No rules, no plans, just some pretty fabric and a nice thread combination.


I played around with my camera settings while I stitched, and ended up with another time-lapse video to share. It's very fast. Too fast, but it was still fun. BTW, you can slow the video play yourself, by clicking the gear icon towards the bottom right corner. It may affect the quality though.


I guess it's fitting that a health issue made me get back to more free motion just for the heck of it. I started quilting in earnest while my hubby was going through cancer treatments. Quilting keeps me sane and it's cheaper than therapy (not the mention the ER).


Amy's Top Tips for Quilting with Rulers on a Sewing Machine

Whether it's a sewing machine, domestic machine, or sit-down long arm, if you quilt by pushing your quilt instead of moving a machine, I've got some great tips for using rulers to guide your free motion quilting.

ruler work quilting using rulersto quilt

Ruler work is a great technique for a huge range of skill levels. If you are comfortable moving your quilt under your machine, you can do ruler work.

If you're a beginner, using rulers helps you figure out the all-important "Where do I go next?" issue. Just follow the ruler. Specialty rulers can give you design options that you might not be able to create on your own.

create motifs with rulers with ruler work quilting

If you're more experienced with free motion quilting, ruler work can help you develop a framework that really helps your free motion quilting shine.

These tips are garnered from over 5 years of doing ruler work on my Janome machines. I've had a good long time to try all kinds of rulers and see what works and what doesn't.

So let's get to my top tips for quilting with rulers:

  • First of all, it really is easier than you may think! Try it and practice.
  • Anything that helps you move the quilt smoothly helps with ruler work. Having the machine flush with a large, smooth surface is the best. 
  • Arrange big quilts in a series of peaks and valleys around and under the machine. You only need it flat where you are quilting and under the ruler. The folds of the peaks and valleys act as hinges to move just the area of the quilt you are working on while letting the bulk of the quilt stay stationary. This reduces the weight of what you need to move.

  • DON'T do ruler work without a ruler foot! At best, you'll be extra tense trying to make sure the ruler doesn't hop over or under the foot. At worst, you'll break a needle and throw the machine out of time. Janome was the first with a ruler foot (even if I had to convince them that it could be used on a stationary machine), followed by the Westalee foot, plus a few others,  Bernina now has its official ruler foot for its newer machines and I recently heard (9/14/17) that Babylock is releasing their own ruler foot.
  • Make sure the ruler foot is low enough on the quilt for good stitch formation without causing drag on your project. You will likely need to change the foot height for different thickness of projects.
  • Wear quilting gloves! Drop your finger tips over the edge of the ruler and the grip of the gloves will help you lock the ruler in place while you move your project at the same time.
  • Don't shove a too thick ruler under the presser foot bar behind the foot, which is mainly an issue on low shank machines.
Westalee ruler foot

  • Given the above tip, thicker rulers are easier to control. They feel better in the hand and have more of an edge to grasp with your finger tips.
  • Handles and other grips can be handy. Some grips may be too tall for domestic machines though.
  • Use a non-slip grip product on your rulers. There are several types, but my favorite are the round silicone ones I sell in my shop. I still say the gloves are more helpful than products on the ruler, but they do help.
  • Don't press too hard on the ruler. Not only will it make it harder to move your quilt smoothly, but it will likely cause the ruler to slip. Trap the ruler in your gloved finger tips instead.
  • Basic rulers are easier to manage than specialty shapes. The more changes in direction, the harder to keep the foot along the edge and keep the pressure even to keep the ruler from slipping. For example, repeating the curve of a half circle is easier to manage than a series of clamshell shapes and results in the same design. Costs less too.
  • Speaking of rulers; you can get a huge range of design options with a good straight ruler and some curves in a range of sizes. My second class on ruler work is all about making great designs with basic rulers. Take the first one before the second, unless you've already begun to do ruler work. See link in sidebar.
  • While one of the advantages of using rulers is to make great shapes without marking your quilt, sometimes you need to mark registration lines. Mark 'em if you need to.
using rulers for ruler work quilting
  • Ruler work can give impressive, precise results, but can also be tediously slow. This is especially true for specialty templates made to mimic free motion designs. Some quilts need one but maybe not the other.
  • Related to the above tip; don't let ruler use keep you from learning and improving in free hand free motion designs. They both work beautifully together.
  • Want to learn more about using rulers to guide your free motion quilting? See my classes on Craftsy. See link in sidebar.
  • Have questions regarding specific rulers or a ruler foot for your machine? Contact me through my website and I can answer those questions and make sure you get what you need.

If you found this post or my previous posts on ruler work useful, pin it or pass it along. After promoting and teaching quilting with rulers on sewing machines for so long, it's getting a lot of attention these days by some real big players in the quilting industry and I'd like to not fade into obscurity. It's a fabulous technique and I hope you will give it a try!


There are affiliate links on this site. They help me continue to share great tips with you.