Showing posts with label quilting. Show all posts

Binding Quilts with the Janome Quilt Binder Set

I love to free motion quilt my quilts, but once I get done quilting them, especially if I've gone a little over the top with ruler work and dense fills, I tend to stall out on the binding. So I finally got around to using the Janome Quilt Binder Set.

I am totally in love with the quilt binder set! It's perfect for just getting these quilts bound and done. And I'm a big fan of done over perfection any day.

People usually wonder, "What about the corners?" Well, I think my corners are possibly better than my usual traditional method. I've got a pictorial tutorial for you and I will hopefully follow up with a video at some point. (This is not the easiest process to get good video footage while still getting my hands where they need to be.)

turning the corner with the quilt binding attachment
Four fabulous corners and #2 is where I joined the beginning and end!
This is the Janome Quilt Binding Set, not to be confused with the simple binding foot, which can't handle the thickness of a quilt but does a great job with binding raw edges of garments or making thin straps. If you have something other than a Janome, check with your dealer as I would think some of the other brands would have a similar product.

Janome Quilt Binding Set
It attaches to the machine, in part, by replacing the bobbin cover door with the base of the binder set, so it's important to get the right one for your machine. It's only meant for the bigger machines as you've got to have some room to work.

feeds the binding onto the quilt

It does a half inch binding using a 2 inch strip of fabric. There are other binders that are compatible that do different sizes, but you need the base from this set to make them work with means another purchase, which can get spendy. So just stick with this one unless you've got your own sweat shop going.

I cut my strips 2 inches wide and join them with 45 degree seams, then press to one side. I've tried to press them open but the binder just pushes them to the right as it is fed through, so to one side they go. I also make sure to load it with the seam allowances going to the right.

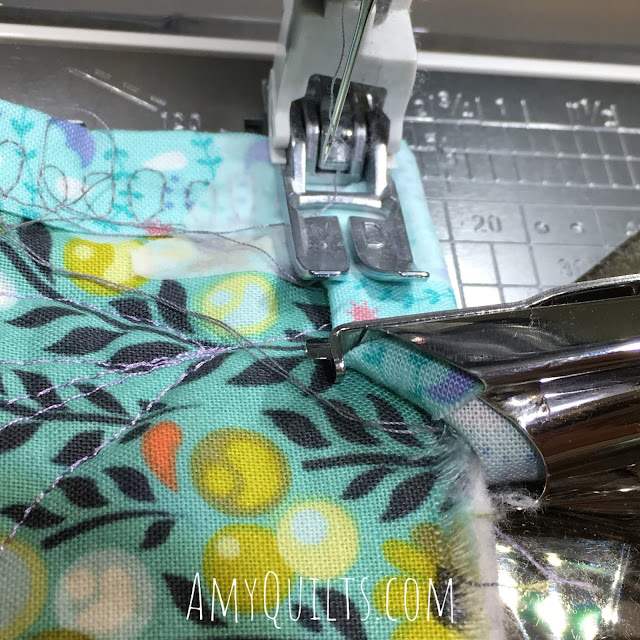
 As you can see in the above picture, the attachment wraps the binding around the edges. That 90 degree positioning/fold of the binding really helps get the quilt fully into the binding. There are several adjustments that the various screws allow you to make, including angling it for a curved edge and making the bottom fold stick out further than the top fold of the binding.

It comes with a foot but I chose to use my narrow Acufeed Flex Foot (a built in walking foot that is perfectly synchronized to the regular feed dogs) for more even feeding of the quilt layers and binding. It works fabulously together.

You can use a straight stitch but using a decorative stitch ensures that you'll catch both edges of the binding for sure.  In these two samples, I used pretty wide stitches because they looked great with the quilts, but I have used a narrow serpentine stitch, blanket stitch, and straight stitch with great results.

When you get to a corner, you stitch right up to the edge. Then you lift the foot and pull the quilt straight back about 10-12 inches (away from you) and put the foot back down on top of the binding and finger press the folded binding hanging out the back of the machine. Don't skimp on how much you pull through the back or you won't have enough to comfortably work with.

turn the binding around the corner

Then you fold the mitered corner down in front and secure with pins or tape, then the same for the back.
Kimerbell tape to secure

I now prefer Kimberbell Tape to do this. I do not sew over pins and when using them, as soon as I took them out, it would shift. I can sew right through the tape and it picks out easily without gumming up my needle or fabric.

Kimberbell tape on the back

Then you pull the quilt towards the back and insert into the extra binding that was pulled out. Then you carefully pull the binding backwards through the binder attachment, moving the quilt backwards as you go, until you are at the corner ready to continue stitching.

Gently pull until the binding encases the edge and you are back at the corner

Since I use the Kimberbell tape, I don't have to futz with pins. Just start stitching again. For the record, I wouldn't use any other brand of tape for this even it it does look like paper bandage tape. It's been made for stitching through.

turning a corner with the Janome Quilt Binder Set

And how do I join the ends of binding? There are a couple of different methods, but I am now a fan of joining the ends at a corner! This means I can use the binder as much as possible. If I joined along a side, I'd have to wing it to secure the binding on either end of the join.


 So I just hand tuck the raw ends to make a nice mitered corner and stitch it down. If I stitch all four corners down at the miters, it would be super duper hard to tell the difference. My friend and one of my favorite customers, Ann, took a look at this quilt and totally approved.


Because the attachment covers the bobbin cover door, you'll want to start with a full bobbin. Learn from my experience! Also, I don't recommend using a super complicated decorative stitch for this reason; uses more thread.


I wouldn't use this for show quilts, but if you want something to help get quilt binding done, this is fabulous. Great for charity quilts, utility quilts, and in my case, shop samples. I know some will say they prefer to hand bind, that's it's relaxing. I actually agree, but I am strapped for time and this helps.


My daughter is certainly happy to finally have her first quilt done. She pieced these 10" squares together and then we split the quilting. We each quilted every other block, and then it sat....waiting for its binding. Now it's all done!

Now, it's not cheap. But time is priceless. Many dealers don't keep the binders in stock because of the price, but I do, now that I've seen how easy it is to use. You can find the Janome Quilt Binder Set over at AmyQuilts.com in two versions for different machines.

Finally, yes, I'm back to blogging here. Turns out our online shop's blogging platform makes it difficult to format a decent article and more importantly, it didn't allow me to respond directly to comments! That's a total deal breaker, so this will become the blog for all of my sewing and quilting adventures.

Janome Quilt Binder Set

I have tried out the Janome Quilt Binder Set recently, and I think this might be just the tool I need to get more of my sample quilts, as well as utility quilts bound up in a jiffy! I seem to stall out at the quilt binding stage, but with a little more practice, I'm going to get caught up.


 Now, there are a couple versions of this binding set for different machines. I had one that came with the existing inventory when we bought the shop. It was rather old and the packaging showed it. It's not a cheap tool, so I knew I'd have to play with it if I was going to prove that it was a worthwhile item. I set it aside and there it sat.

When I got it out finally, I discovered it was made for the bigger 7mm stitch width machines like the 6600P, MC7700, 11000, and the like. I didn't have any of those machines in the shop so I tried it on a smaller 7mm machine, the 4120. It fit that machine, but just barely. It was a little hard to maneuver.


But after just one test quilt, I went ahead and ordered the set that would fit on my 15000 and other Janome 8mm stitch width machines, like the 8900, 8200, 9400, etc.


Corners were easier than I expected. However, once I moved to a real quilt, I had trouble lining up the edges of the 1/2 inch binding to get it to stitch down perfectly, all in one pass. I do think trying to work under the small space of the 4120 was partly responsible.


I was able to stitch the entire binding down, including all four corners in 57 minutes! That didn't count for the final joining of ends, and I missed the binding in a few places, but overall, it's definitely worth doing it enough to perfect the technique!

I'll keep you posted on this tool and whether I think it's worth the investment.

Also I am happy to announce that the Ruler Work Upgrade is now available for the Janome 9400. The demand is great and it's getting into an out of stock item quickly. In fact, Janome is sending me a loaner machine so I can shoot videos of the ruler foot in action and it's been put on backorder! If you have the 9400 and want to do ruler work....talk to your dealer asap! Yes, it's totally worth it! The software update will make it impossible to clunk your ruler foot and your needle clamp together. Janome is the only machine on the market with such a foot and feature.

By the way, many of you have asked about the Glide thread that I use for so much of my quilting. I sell it online, but have yet to list it in as many colors as we actually have at Sew Simple of Lynchburg. But I an excited to share that we now carry the Angela Huffman Glide Thread Collection. Ten cones at a great price in a handy storage case. You can order it at Amy's Quilting Adventures.

Amy's Newest Quilting Adventure: Artistic SD16

I've always been a little leery of moving up to a bigger machine when it comes to sharing free motion quilting, ruler work (quilting with rulers), and offering up tips for machine quilting. Especially as I know most of my readers and students don't have huge machines.

But when it comes to quilting big quilts, there's no denying that bigger machines sure help. I hear from many folk that they've taken the plunge to a long arm or a larger domestic machine mounted onto a frame system. Some are delighted, others...not so much.

Artistic SD16

A sit down long arm breaches the divide for me. I don't have room for a long arm on a frame, I certainly don't have the budget for one, and I'm a confirmed "quilt pusher!" I don't have to change or adapt my free motion quilting skills to switch to this machine.


We've got a very large and active long arm dealership in our area, so even if I wanted to AND had the room, I'm not sure I'd bring in the new Janome long arm machines, though they are getting great reviews (they're no longer the Tin Lizzy clones). Plus pushing my quilts to quilt them is my forte, so it makes sense to stick with what I know best.

We've brought in the Artistic SD 16, which has a ton of room and also sits in the same orientation as a sewing machine. I love this! I can reach all parts of the machine with ease and I can push a quilt right to the back without running into the body of the machine.

It comes standard with a stitch regulator too. This is a big help for those with less experience with free motion quilting. My daughter loves the feature. Yes, I've been letting my 11 year old use this machine, with stern instruction to keep her fingers away from the needle.


I haven't spent a lot of time on the machine, being insanely busy keeping the shop all stocked and cute for the Christmas season and keeping customers happy. While my daughter loves the stitch regulator, I'd rather go without. But I'm trying it anyway as we plan on renting time on the machine for interested customers. I insist on knowing my machines!

Turns out that if you're experienced in free motion and used to slowing down your hands if the machine slows down while the stitch regulator slows the machine down if your hands slow down, you end up in a bit of a stand off!


The black button on the quilt above (my daughter's first big quilt) is resting above the stitch regulator which works much like a wireless computer mouse to tell the machine what speed to run at based on the regulator's motion. This is much different than the stitch regulator on a frame based long arm.


I've heard before that many long arm professionals prefer to work without the regulator and when I recently posted on Instagram about my stitch regulator stand off, I got several comments along the same lines from quilters using a sit down machine. Glad to know it wasn't just me or a problem with the machine.


It's been interesting using designs at a larger than usual scale for me. But the intricate quilting I love to do on my sewing machine isn't the thing for a nice cuddly quilt. These are 9.5 inch squares and I'm putting one large feathered flower in every other block. My daughter is planning on doing the rest of the blocks herself.


Above is my beautiful, creative, stubborn daughter. She's also apparently freezing. I swear our shop is a nice temperature, but you can't prove it with this picture. She helped with the basting of her quilt too. I'm looking forward to seeing her stitch on her quilt too. She seems to feel better about doing it on this machine than she does on any of our sewing machines. I'll keep you posted.

How about you? Have you tried these sit down machines? Are you using a stitch regulator?  Is anyone disappointed that I keep going up to bigger machines? 

By the way, if you are local to Lynchburg or within a reasonable drive, we are having our Christmas Open House Event this coming weekend (Dec. 8 & 9) with demos, sales, snacks, complementary scissor sharpening with minimum purchase. (Limit one free sharpening) We've got great deals on machines and exceptional support and service.


How to Choose Quilting Designs


Whether you use a walking foot, free motion, free motion quilting with rulers, hand quilting, or a combination of more than one of these techniques when you quilt your quilt, there are a lot of factors that can come into play when choosing designs. This is why "How do I Quilt This?" type classes are so popular and why this question can cause even the most experienced quilter to cringe (especially if asked in an email without any photos!).

I divide quilting designs into 4 major types:

Overall Designs- These are designs that do not pay attention to the piecing. Similar to a pantograph used by a longarmer, these are great designs for utility, bed and comfort quilts.

Block and piecing designs- These are designs that are based on the piecing. Designs for blocks, squares, triangles, borders and sashing.

The piecing here determined the quilting.
Fills- These smaller designs are for filling in spaces between other types of quilting, adding texture and interest along the way, sometimes they are even used as larger design elements in the quilting.

The Celtic Square design used here is both a motif and a block and piecing design and is surrounded by dense fills to make it pop.
Motif Designs- These are the ones we love to see in fancier quilts; the scrolls, feathers, floral motifs and more that are major parts of the design of a quilt in of themselves.

Don't confuse the types of designs with the type of quilting. There are designs in any of these four categories that can be done with a variety of methods of quilting. Tiny fills are usually free motion, much of what I do with rulers could be classified as block and piecing designs, and large swaths of straight line quilting all the way across a quilt could be done several different ways, but would still be considered an overall design no matter the method used.

Sometimes the design chosen decides the method of quilting. For example, a tiny, curvy, dense design is not likely a good candidate for walking foot quilting.

There are other times that the type of quilting (hand quilting, walking foot, free motion) the quilter wants to do, will help the quilter choose designs that work better for those methods.

Sometimes a design works well for several types of quilting and the quilter will determine which method to use. I could do straight line square spiral design with a walking foot, but since I love using my rulers, and especially if it's a big quilt, I'd choose to use free motion ruler work. You might choose differently.

Someone might choose big stitch quilting to add interest to a quilt and do it by hand, while another quilter, maybe with less time to spare, would set her machine up with some monofilament thread in the top of the machine and use a "hand-look quilting" stitch. Can you guess which method I'd choose? Leave your guess in the comments below.

The four types are not overly segregated and mix and mingle quite often. While overall designs are usually loners, typically, motif and fill designs work together and are pretty much mutually necessary. Block and piecing designs are good mixers in a quilt, and I think are the unsung heroes of quilting.

Overall Designs- Also called edge-to-edge designs. These are some of the easiest designs to begin with, but not all overall designs are simple. They can be large stippling, other larger meandering designs, or even feathers  as an overall design. You can get ideas for these types of designs by looking at quilts done by longarmers with pantographs. Some can even be quite complex, featuring horses, bears, flowers, stars, etc.

This design could be a filler , fit into a block, or made large as an overall design. You choose!

Block and Piecing Designs- This includes the tedious but many times necessary "Stitch in the Ditch" which can also be done with a walking foot without using FMQ. Once you have a good grasp of FMQ, doing stitch in  the ditch with the darning or free motion foot means no turning of the quilt as you stitch. Block and piecing designs can really enhance the piecing in a quilt.

Here's an easy sashing design.

Fills- Pebbles, smaller stipples, even closely spaced lines of stitching are in this category. Leah Day's site does a great job of categorizing and teaching many, many fills at the Free Motion Quilting Project. She's also produced three books of designs, one of which is From Daisy to Paisley: 50 Beginner Level Free Motion Quilting Designs. Keep in  mind that because of the scope of the project and the stitched samples, these designs are shown quite small. At the small size these are great for filling in around larger motif designs or in conjunction with block and piecing designs. It is up to you to decide at what size you want to quilt these for your quilt! Make them bigger and many can even be overall designs.

Motif Designs- Many of these designs benefit from good planning and marking. There's the classic feather wreath and all of its variations, feathered swags and borders. Some motifs are suitable for block and piecing designs too. Traditional whole cloth quilts are fabulous examples of motif designs coupled with fills. Two wonderful books by Karen McTavish (I have most of her books; they're great) The Secrets of Elemental Quilting  and Whitework Quilting: Creative Techniques for Designing Wholecloth and Adding Trapunto to Your Quilts give great examples of using motifs in quilts along with some great tips.

Some general tips for choosing designs:

Quilt Density: the denser the quilting, the stiffer the quilt. And of course, dense quilting takes longer and uses more thread. Save really dense quilting for wall quilts, fancy quilts, and yes, show quilts. No one wants to snuggle down with a stiff quilt, so for comfy quilts, choose an overall design or fairly simple block and piecing designs.

Abbie is happy I didn't quilt her quilt to death.
One of the big differences between what we can quilt with our domestic sewing machines versus those of the longarm machines has to do with our range of motion. We can only quilt in the space between our hands before we have to reposition our hands and quilt. Those using longarm machines, have a range of motion for stitching that is pretty much the range of their upper body motion. This means the designs we choose either have smaller shapes, well-planned changes of direction, or we have to be really good with our stops and starts when repositioning our hands. Usually, it's a mix of all three factors.

Many quilts benefit from "Stitch in the Ditch", stitching along piecing lines to stabilize the seams, keep things square and subdivide the quilt to keep shifting of batting and backing to a minimum. For the most part this type of quilting is done first and many choose to use a walking foot with the feed dogs up. But, again, once you become proficient at FMQ, doing it in free motion can be a lot faster with little or no rotation of the quilt needed.

Applique quilts can also benefit from stitching around the applique shapes. Ann Fahl's book, Dancing With Thread: Your Guide to Free-Motion Quilting, describes this type of quilting and regular stitch in the ditch quilting as stabilizing the quilt and recommends using clear monofilament for this type of stitching in case the stitches wiggle from one side of the seam or applique to the other.

This applique was carefully SID'd to make it pop.

Large motif designs with inadequate fills around them lose their impact. When properly surrounded with fills, motifs can really pop, making a faux trapunto effect. Couple motifs and small fills with a lofty batting and you've got some great dimension and texture. Larger areas of "white space" are prime real estate for motifs.

Much of this article came from a post I did years ago on "How to Free Motion Quilt: the Designs." You may want to see the line drawings there I did to show examples of various types of designs.

Amy's Top Tips for Quilting with Rulers on a Sewing Machine

Whether it's a sewing machine, domestic machine, or sit-down long arm, if you quilt by pushing your quilt instead of moving a machine, I've got some great tips for using rulers to guide your free motion quilting.

ruler work quilting using rulersto quilt

Ruler work is a great technique for a huge range of skill levels. If you are comfortable moving your quilt under your machine, you can do ruler work.

If you're a beginner, using rulers helps you figure out the all-important "Where do I go next?" issue. Just follow the ruler. Specialty rulers can give you design options that you might not be able to create on your own.

create motifs with rulers with ruler work quilting

If you're more experienced with free motion quilting, ruler work can help you develop a framework that really helps your free motion quilting shine.

These tips are garnered from over 5 years of doing ruler work on my Janome machines. I've had a good long time to try all kinds of rulers and see what works and what doesn't.

So let's get to my top tips for quilting with rulers:

  • First of all, it really is easier than you may think! Try it and practice.
  • Anything that helps you move the quilt smoothly helps with ruler work. Having the machine flush with a large, smooth surface is the best. 
  • Arrange big quilts in a series of peaks and valleys around and under the machine. You only need it flat where you are quilting and under the ruler. The folds of the peaks and valleys act as hinges to move just the area of the quilt you are working on while letting the bulk of the quilt stay stationary. This reduces the weight of what you need to move.

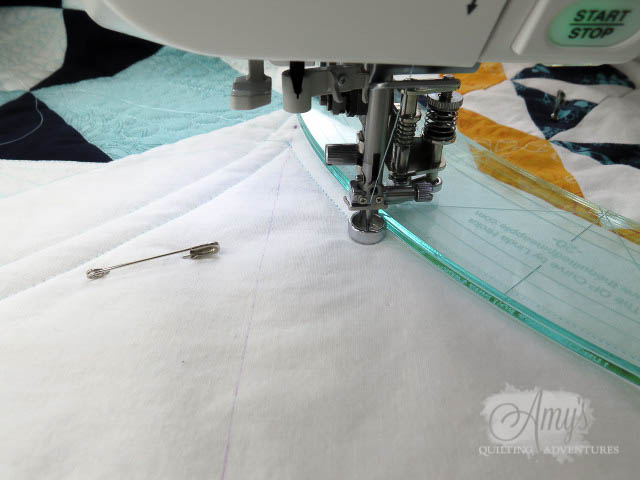
  • DON'T do ruler work without a ruler foot! At best, you'll be extra tense trying to make sure the ruler doesn't hop over or under the foot. At worst, you'll break a needle and throw the machine out of time. Janome was the first with a ruler foot (even if I had to convince them that it could be used on a stationary machine), followed by the Westalee foot, plus a few others,  Bernina now has its official ruler foot for its newer machines and I recently heard (9/14/17) that Babylock is releasing their own ruler foot.
  • Make sure the ruler foot is low enough on the quilt for good stitch formation without causing drag on your project. You will likely need to change the foot height for different thickness of projects.
  • Wear quilting gloves! Drop your finger tips over the edge of the ruler and the grip of the gloves will help you lock the ruler in place while you move your project at the same time.
  • Don't shove a too thick ruler under the presser foot bar behind the foot, which is mainly an issue on low shank machines.
Westalee ruler foot

  • Given the above tip, thicker rulers are easier to control. They feel better in the hand and have more of an edge to grasp with your finger tips.
  • Handles and other grips can be handy. Some grips may be too tall for domestic machines though.
  • Use a non-slip grip product on your rulers. There are several types, but my favorite are the round silicone ones I sell in my shop. I still say the gloves are more helpful than products on the ruler, but they do help.
  • Don't press too hard on the ruler. Not only will it make it harder to move your quilt smoothly, but it will likely cause the ruler to slip. Trap the ruler in your gloved finger tips instead.
  • Basic rulers are easier to manage than specialty shapes. The more changes in direction, the harder to keep the foot along the edge and keep the pressure even to keep the ruler from slipping. For example, repeating the curve of a half circle is easier to manage than a series of clamshell shapes and results in the same design. Costs less too.
  • Speaking of rulers; you can get a huge range of design options with a good straight ruler and some curves in a range of sizes. My second class on ruler work is all about making great designs with basic rulers. Take the first one before the second, unless you've already begun to do ruler work. See link in sidebar.
  • While one of the advantages of using rulers is to make great shapes without marking your quilt, sometimes you need to mark registration lines. Mark 'em if you need to.
using rulers for ruler work quilting
  • Ruler work can give impressive, precise results, but can also be tediously slow. This is especially true for specialty templates made to mimic free motion designs. Some quilts need one but maybe not the other.
  • Related to the above tip; don't let ruler use keep you from learning and improving in free hand free motion designs. They both work beautifully together.
  • Want to learn more about using rulers to guide your free motion quilting? See my classes on Craftsy. See link in sidebar.
  • Have questions regarding specific rulers or a ruler foot for your machine? Contact me through my website and I can answer those questions and make sure you get what you need.

If you found this post or my previous posts on ruler work useful, pin it or pass it along. After promoting and teaching quilting with rulers on sewing machines for so long, it's getting a lot of attention these days by some real big players in the quilting industry and I'd like to not fade into obscurity. It's a fabulous technique and I hope you will give it a try!


There are affiliate links on this site. They help me continue to share great tips with you.

Free Motion Quilting Troubleshooting: Bad Bobbin

When it comes to free motion quilting, there's a ton of variables to address before you get great results. Once you've mastered the basics of moving the quilt, hand speed, tension, and designs you might feel like you're good to go. That's when it can get a bit mysterious.

You've been having great results and then something happens. Check the threading, change the needle, tweak the tension. Most of the time it will straighten out. But occasionally you will be beset with a perplexing intermittent problem. Perfect stitches for good long run followed by 6 or so tangled stitches and then everything is fine again.

A tangled loop of top thread on the back of my quilt.

Check all the typical variables but it keeps happening. It could be a burr in the needle plate that only hits threads when the quilt moves a certain direction. Maybe a stray thread in the thread path. Maybe the quilt is hanging up on something. Sometimes it's a run of bad thread. It can be very perplexing.

For me, it can be a poorly wound bobbin. That's what I want to focus on in this post today.


Sad to say, it is usually operator error when it comes to my bobbins. I get in a rush and don't pay attention. That's what happened to me recently. Now, I only have Janome bobbins here. That's not always the case with a lot of sewists. We get a lot of machines into the shop that are loaded with very much the wrong bobbin. That can cause a bunch of trouble that is easily fixed. Check your bobbins.


The poorly wound bobbin above was the result of me being careless and leaving my machine cluttered with extra feet and needles in the path of the bobbin winding thread path. I love the storage on top of the machine, but I wasn't paying attention and the thread was rubbing on the top of a foot that was out of place.

I stripped off that last bit of thread and started sewing. All was well for about 30 minutes, then I heard a little snick sound. I've talked before about learning the sounds your machine makes. Everything looked fine so I kept stitching and listening. Snick. Check the stitching. Fine on the top but there was a tiny nest of thread on the back. Did a little pulling and confirmed it was top thread. That tells me it was a bobbin area issue.


Check the bobbin and found this knot in the middle of my bobbin with thread wrapped around it. I had my suspicions right away but did a strip search anyway. After pulling off several yards of thread, I realized that when I held the tail of the thread while the bobbin was winding, I held it too long and the thread doubled up on itself into this tangle. Then the rest of the bobbin thread covered it up.


There's a new feature on some of the newer Janomes that completely eliminates this operator error. It's a plate that looks like a plastic saw blade that the bobbin sits on as it is wound. You set the bobbin in place, wrap the thread around the bobbin a few times and then tuck the thread between any of the plastic fingers/teeth of the the plate and it cuts off the excess thread and holds the end while the thread is wound. I don't have this lovely feature.

My solution is just to be more mindful when I wind the bobbin! I ought to know it by now, but I forget from time to time in my hurry to wind the thing and get back to quilting. Any snags, knots, and other things that cause the bobbin to go bad, will cause you grief.

In most cases, a poor bobbin will give you tension issues. In this case, the knot was keeping the thread from unwinding until it was tugged enough by the top thread, which would cause the top thread to get pulled too deep into the machine and make the hook grab it and make a nice nest.

I'm not a bird, I want no nests on my quilts!

So there's one of those things that can give you mystery issues when quilting. What's an issue you found that caused you such intermittent problems that you've figured out?

Quilting with Minky

I'm quilting away on my niece's quilt whenever I can. Because this sweety needs a quilt from her auntie, doesn't she?


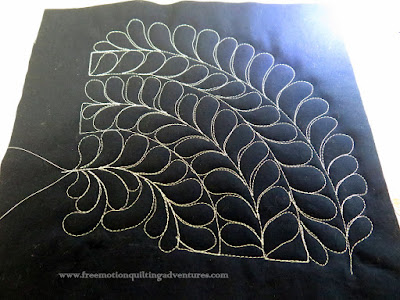
It's a bit hard to see the quilting on these pretty prints, but it's the feathered flower from my latest video post.


The new thing I'm doing with this quilt is backing it with a minky-type fabric. So far it's working well. It's pin basted pretty securely, but I do have to watch the minky edges to make sure they're not curling under and getting stitched to the back. I probably should have used a thinner batting with the minky instead of my usual Hobb's 80/20.


It feels a little different as I move it under the machine. I think it depends on how I'm moving it, as this fabric is combed down (is that the term?) in one direction, giving it a bit of a nap. Not causing a particular problem, just feels different.


It feels incredibly soft and still shows the quilting pretty well on the back. I suspect after washing, the fuzz will pop out from under the stitches and hide the stitches though. I've heard that it can leave a ton of fuzz behind as you cut and sew it. I haven't had this problem, though I had exactly what I needed as it came from the store. I'm sure I'll get fuzz once I trim the excess.

Have you used Minky as a backing before? How has it worked for you?

Quilting Tip Video: How to Remove Stray Threads Inside the Quilt

I've got a great little quilt tip on video for you today. Have you ever found after quilting your top that there are dark threads showing under light colored portions of your quilt. How annoying!

Watch and see how I fish those little stragglers out.


I cannot believe how easily I hooked that thread out! Trust me, while it's not hard, I rarely hook it that fast!

Now I'm back to quilting on this sampler. I love how it's turning out, but I am so ready to be done with this piece and move on to something new!

Free Motion Quilting Practice: Feathers Top to Bottom

Yesterday I shot a video demo for the folks at TopAnchor Quilting Tools. They make these incredible rotating specialty templates for quilting with a long arm. Since I started using and teaching about using rulers and templates to quilt with stationary machines, many of their products have also been sold to users of (mostly high shank) sewing machines and sit-down long arms.

I showed how to use their Baptist Fan template. It's a very tricky template to use on a stationary machine, but they tell me that there have been plenty of quilters curious about how to use it on a stationary machine, so a video is one of the best ways to show it.

I'll be uploading that video to YouTube shortly, but in the meantime, I used the sample to do a bit of free motion quilting practice. I got home from work dead-dog tired. I love working at the Janome dealership, and am full of enthusiasm when I'm there, but I am an introvert and I kinda crash after a full day there.

free motion quilting feather practice
Those arcs are made with the Baptist Fan template

Doing some completely free quilting, no need for a finished project, helps fill my batteries! I grabbed the sample and began to use the stitched arcs as feather spines.


Free motion quilting practice feathers
Feathers, made from bottom to the top.

It wasn't long before I reached the top of a feather and decided I really need to practice stitching feathers from the top down. I always, always stitch my feathers from the bottom to the top. It means planning ahead to how you will get from the top of a plume to the bottom to finish out the other side. But I know there are talented quilters who can do feathers 'backwards' so I decided to give it a try.

practicing stitching feathers from top to bottom
First run of 'backwards' feathers, going from top to bottom of the spine.
In the picture above, my seam ripper is pointing down the feather in the direction I stitched. (No cute pointer hand this time; my son took it with him to Grandma's house!) The first plume wasn't bad as there was no other plume to fit it against. Then I was committed. It was a bit wonky after that, but like everything, it got better (mostly) with practice.

practice free motion quilting designs feather plumes
Not too bad. Everything gets better with practice.
The last two rows of plumes were stitched backwards as well. Some were pretty wonky, but it wasn't too horrible. I tried to picture in my mind what the whole plume looked like as I stitched. It was hard to keep from over-doing the lower curve of each plume and to get the area where the plume met the spine from being to wide and straight. But it was good practice.

I like to think of such practice as good exercise for my brain. I wrote about how quilting is good for preserving the gray matter in my newsletter that came out this past Tuesday. You are signed up for my newsletter, aren't you? You can sign up over on the right sidebar.

I'm sure some of you will wonder if I will carry the Baptist Fan template in my shop at Amy's Quilting Adventures. While I aim to provide a great collection of rulers and templates for ruler work, right now I'm not carrying it. As I said, it is very tricky and probably best suited to long arm systems (sit down or regular) but you can certainly buy it through TopAnchor.

My question to you is: What ways are you challenging yourself in your quilting practice? Are you trying new shapes, threads, designs? Maybe you are wanting to try ruler work (You should check out my class at Craftsy- Quilting with Rulers on a Home Machine!) or even try a new piecing technique.

Let me know in the comments what you are doing to stretch yourself when it comes to quilting or creativity.